Write off direct debits
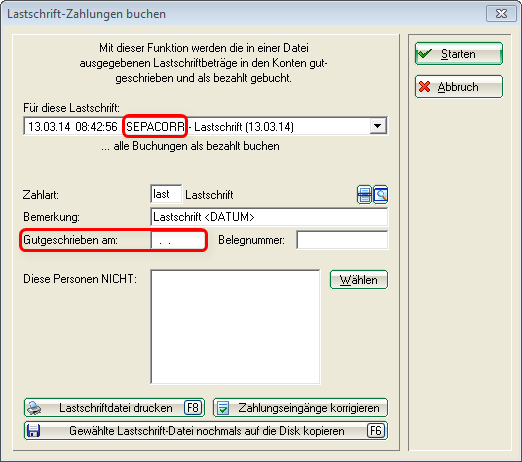
Use this function to set the invoices for which you have previously created a direct debit file to paid in the accounts. In the PC CADDIE menu, select Sales/Payment interface…/Clear direct debits
- First select the relevant direct debit file here. In our example, it is a SEPACORR file, i.e. there are both first and subsequent direct debits in the file.
- If you select „Credited on“ then the data you used when creating the Sepa file is automatically posted. This means that first direct debits can be automatically booked out on a different date than subsequent direct debits, which may have had an earlier date when the SEPA direct debit file was created. If you enter a date, ALL direct debits will be posted on this date.
- If you have not entered a payment method direct debit, please create one.
- It is better not to exclude people for whom the direct debit did not work out from the write-off. We recommend that you all payments and, in the case of those for which payment could not be collected due to insufficient funds, for example, to post the payment in the account the person's account. You can then use the PC CADDIE chargeback manager. In the account, you can also better track what has happened with this customer. You also have the advantage of being able to cancel the direct debit as soon as your file has been imported into the online banking programme or saved on a data carrier. You can cancel returns in the account if necessary.
- Start Start the process after checking the correct settings.
TIP Under Print direct debit file (F8), you can print out the checklist for the direct debit selected under 1 again for checking purposes.
Affected customers initially have a disc in their account:
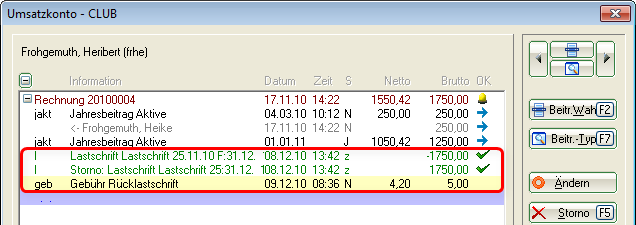
In the account, the write-off looks as follows:
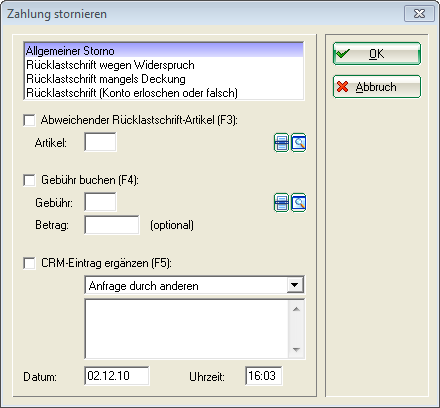
If you want to cancel a payment, select the line of the payment, click on the right on Cancellation (F5) on the right and in the following selection click again on Cancel. Then select the appropriate option in the returned direct debit manager:
If you want to charge a fee, select an item that you have previously created. If the amount of the item changes, you can change it via Amount (optional) to change it. The customer account will then look like this, for example:
- Keine Schlagworte vergeben


