Inhaltsverzeichnis
CRM settings
These settings are available to you with the module CRM\DMS .
Select Settings/Programme settings/Settings for appointments and person history. The following window opens:
- Select Define categories, to view and customise predefined settings or to create new categories.
- Select Automatic data import, to make settings for the automatic data import to PC CADDIE, e.g. also an Outlook plugin.
- If you use the module People pictures module, you can import images here.
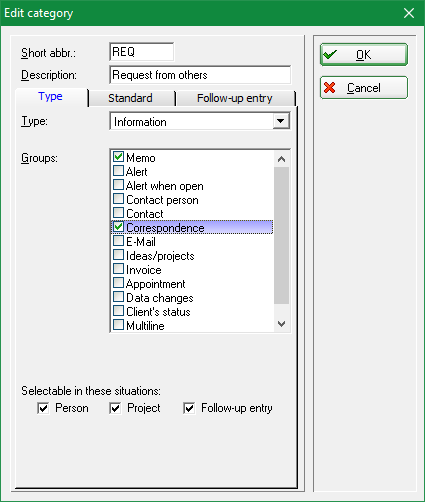
Define categories
You can edit the categories here.
- Click on New, to create a new category.
- Click on Edit, to edit a category.
You can find a detailed description under Define and change categories for the CRM/DMS.
Crypt entry
Under Options/Basic settings
Select categories
Then click on NEW
1. enter short code
2. enter description
Tab: Type
3. type: change to: Encrypted information - this is the password query later in the entry
4. groups: Note
Tab: Standard
1st operator: switch to: Private
2. status: change to: done
The colour can be assigned here if desired.
Tab: Follow-up entry
Nothing needs to be filled in.
You can now use this category to store password-protected messages. You call up the category: Crypt under New and are asked twice for a password. This password then protects the message and is requested each time it is called up. But ATTENTION: lost and forgotten passwords remain lost and forgotten - even we in Support cannot crack password-protected entries without the password!
Automatic data import
- You can install the Outlook plugin in the following ways:
- Way 1: People / Appointments / Options / Automatic data import/
- Path 2: Settings / Programme settings / CRM settings / Automatic data import
- Path 3: New/create/edit/delete persons / Options / Basic settings / Automatic data import
- Under Fax/Telephone you can configure the settings required for the interface to the software package supplied by AVM with a FRITZ!Box or FRITZ!Card. Select the database directories for faxes and telephone calls here. PC CADDIE is then able to transfer incoming faxes directly from the FRITZ!fax software or recorded messages from the FRITZ!fon software directly to CRM\DMS .

- Keine Schlagworte vergeben


